Triarom Phonebook User Guide
This book covers the use of Triarom Phonebook. This is the externally shared user guide for Triarom Phonebook.
Introduction to Triarom Contacts
Triarom Contacts is a service provided with all Triarom VoIP subscriptions, it's a simple online phonebook that automatically synchronises with your handsets. When you add a number to your Triarom Contacts phonebook, it appears on your phones.
Your access to Triarom Contacts is created automatically when we register you for VoIP services. We'll send you an initial password when you register, you'll be asked to change the password when you first login.
If you already had a Triarom VoIP subscription before Triarom Contacts was introduced, we'll be in touch to setup your account in due course.
Triarom Contacts is compatible with multiple manufacturers of VoIP phone, so the same phonebook will work across all the devices in your installation, even if they're not all the same.
Triarom Contacts has an API that can be used to dynamically update the phonebook with custom software, or in some circumstances, we can implement custom solutions for you. Triarom Contacts is open source and the source code is available at https://github.com/nevexo/voip-phonebook
Logging in to Triarom Contacts
Before starting, you'll need to know your account details, you'll have been emailed these when you registered for the service, but if you need your password resetting, please contact us on 015394 44639 - we'll confirm a security question and reset your password.
To access Triarom Contacts, visit https://contacts.triaromconnect.net - if you're not already logged in, you'll be redirected to the login page.
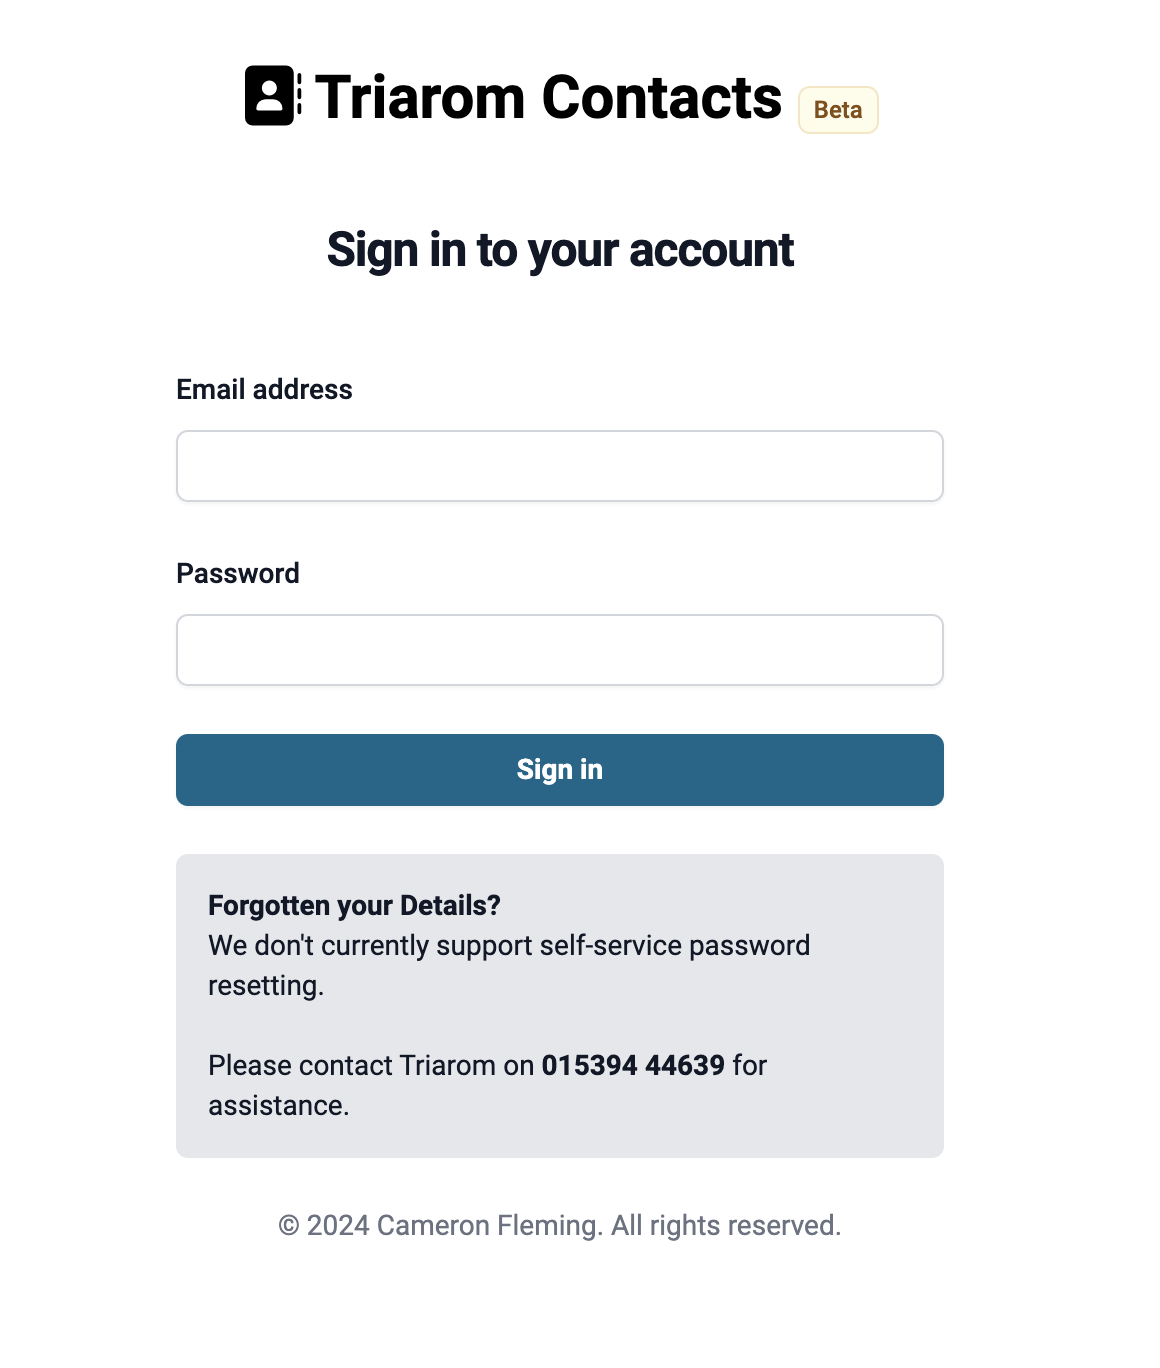
On this screen, please enter your email address (this is usually the primary contact email address we have for you, but you can contact us to confirm if you're not sure)
Then enter your password, if this is your first time logging in, or you asked us to reset your password, you may be asked to chose a new password immediately after logging in.

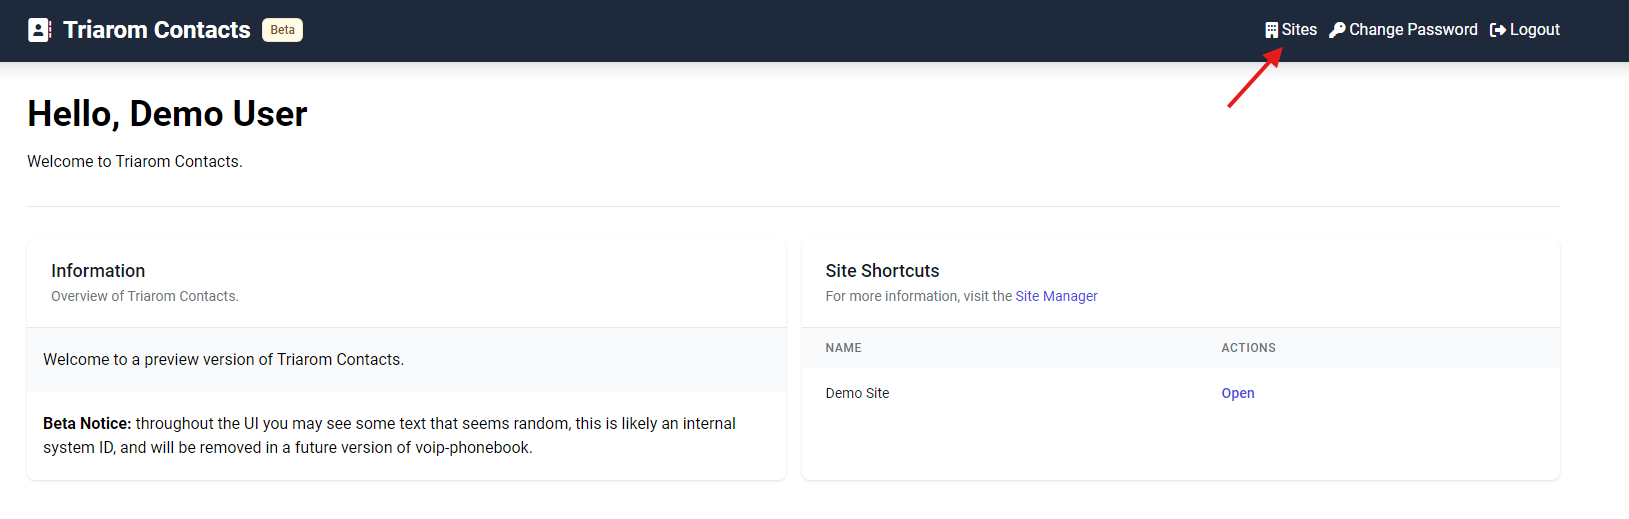
Once logged in you'll see the Triarom Contacts dashboard, this shows some introductory information about your account and has a list of your sites on the right. For a full view of your sites, select the Sites link on the top navigation bar.
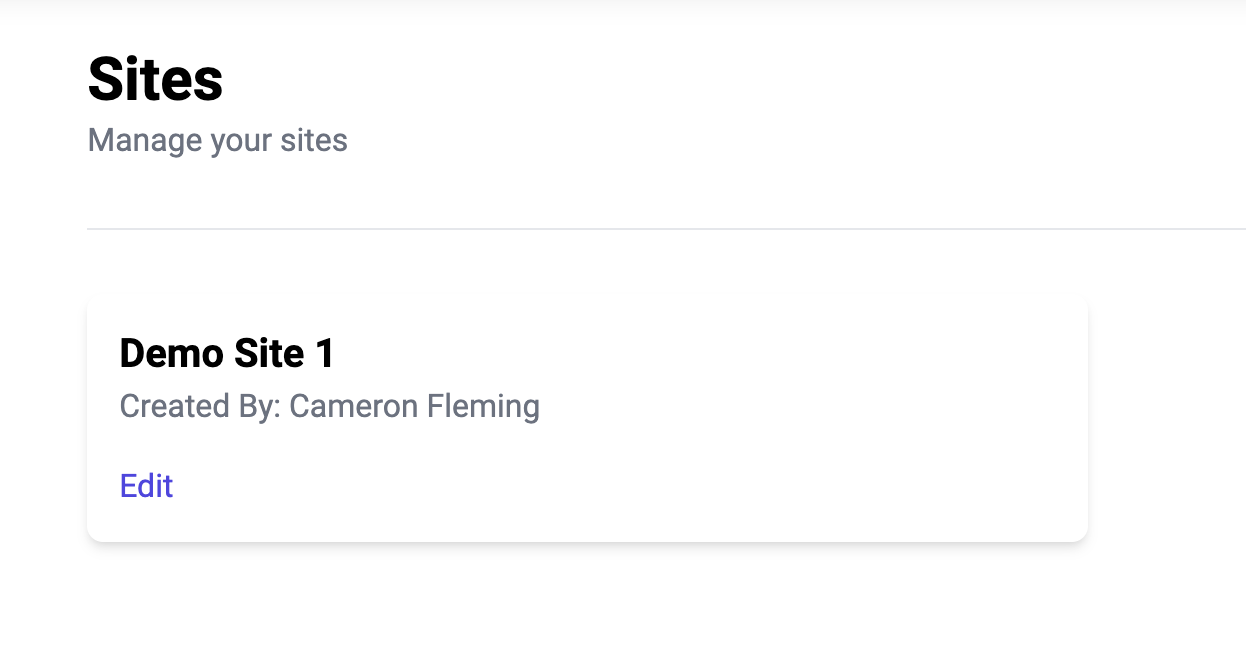
In your sites list, you'll see any sites your account has access to. The created by section will show the member of staff that originally created your site.
Managing Your Phonebooks
Access Your Phonebook
To begin, login to Triarom Contacts. Instructions for this can be found at Introduction to Triaro... | Triarom Knowledge Base
Access Your Site
You'll be taken to the home page, at the top, select "Sites"
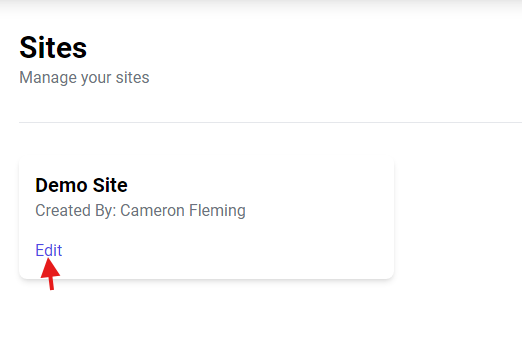
You'll now see a list of your sites, select "Edit" on the site you wish to access.
Locate the phonebook you wish to access, and select View/Edit
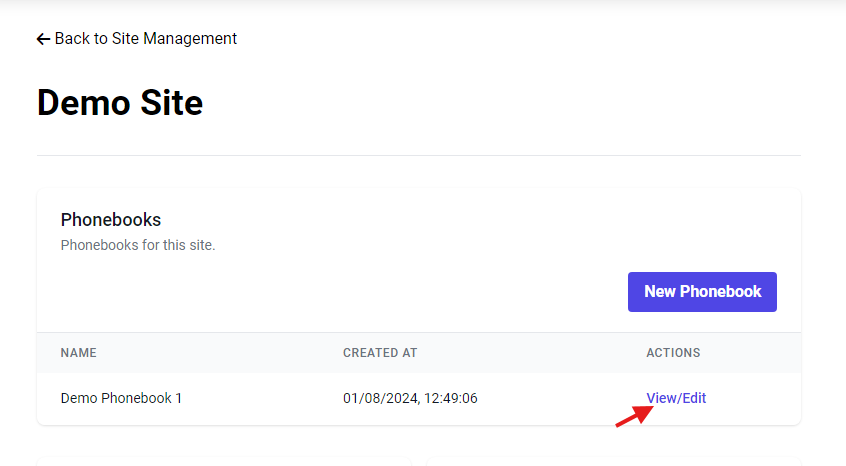
You can now use this page to make changes to your phonebook records.
View, Add, Update and Delete Phonebook Records
This guide covers adding, updating and removing records from your phonebook. You'll need to access the correct phonebook first, please see Access Your Phonebook | Triarom Knowledge Base for more information.
NOTE: Phonebook fields are defined per-site. Because of this, the fields you see in this document may not match the fields setup in your site. Triarom Engineering can help with adding or modifying fields in your phonebook.
View your Current Records
Your list of phonebook records is shown at the top of the page.
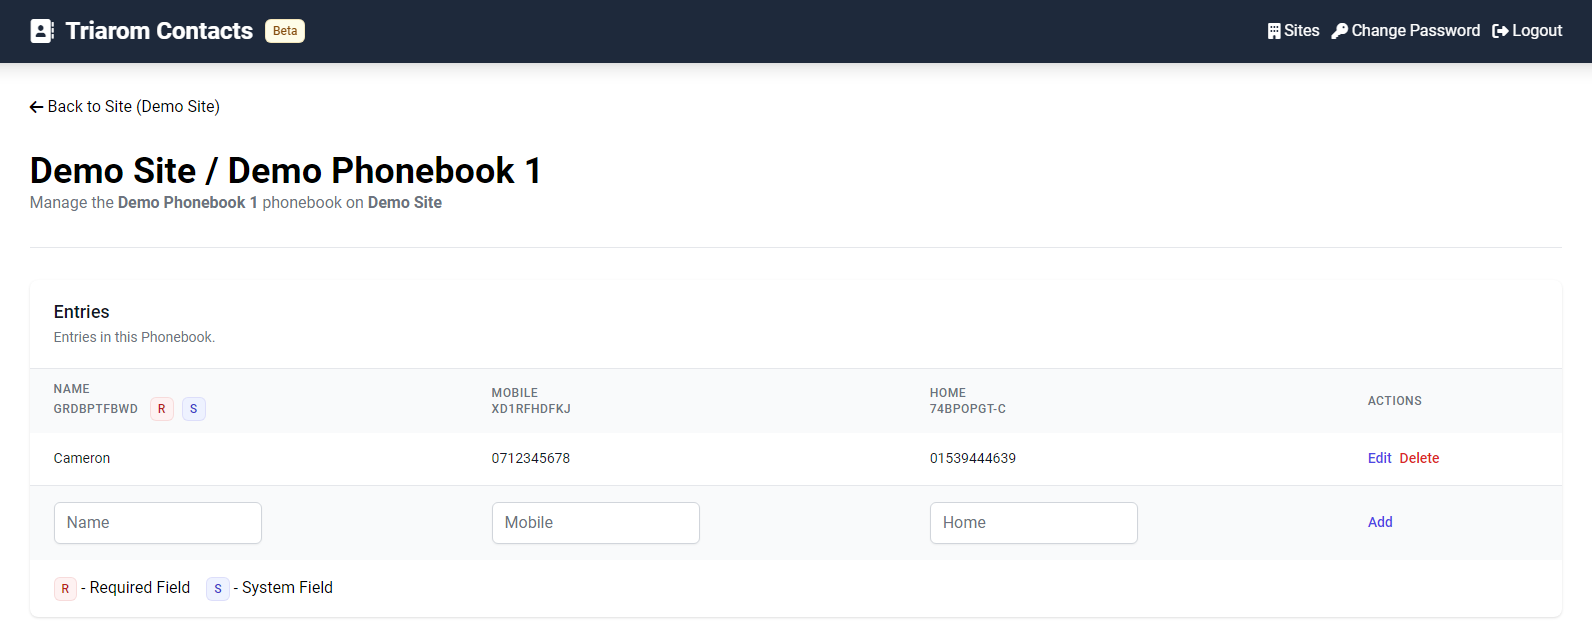
In the table, you'll see a list of fields, some of them may have extra information flags.
 Required Field - This flag indicates the field must be specified when creating a new entry.
 System Field - This flag indicates the field was created automatically by the phonebook software, and can't be modified.
Add a new Record
To add a new record, scroll to the bottom of the records list, and fill in the boxes with the information for your new records, you must specify any fields with the R flag. However, you can leave non-required fields blank.

In this demo, the "Name" is set to "Demo Record", a mobile number is defined, but the home number field is left blank. Click Add.
The record has now been added to the system, and will be available on your phone.
NOTE: You may need to refresh the directory listing on your phone, please see the guide for your phone model on how to do this.
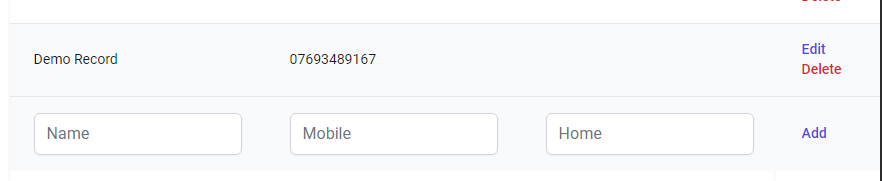
Update an Existing Record
To update an existing record, locate it in the list and select Edit.

Text boxes will appear in the row, modify the record as necessary. Note that you must ensure all required fields are entered.
When you're done, click Save.
The record will be updated on your phones.
NOTE: You may need to refresh the directory listing on your phone, please see the guide for your phone model on how to do this.
Delete a Phonebook Record
NOTE: Deleted records cannot be recovered.
To delete an existing record, locate it in the list and select Delete.
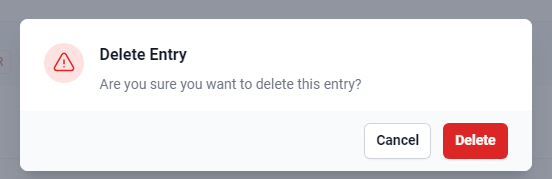
A confirmation box will appear, confirm you wish to delete the entry by selecting Delete.
The record will be removed, and will no-longer appear on your phones.
NOTE: You may need to refresh the directory listing on your phone for it to disappear from the screen, please see the guide for your phone model on how to do this.